
How to Make Dashimaki Tamago: The Most Detailed Guide, Every Step Other Recipes Skip
By Yuki, Osaka cooking class instructor, yukichef.com
If you've ever watched a Japanese chef roll a perfect dashimaki tamago and thought there was no way you could do that at home, this guide is for you. I've taught hundreds of travelers in my small-group classes in Osaka, and dashimaki tamago is the dish that humbles everyone, including people who already cook beautifully.
Here's the problem with most dashimaki tamago recipes: they tell you what to do, but not how. They say "roll the egg" and move on, skipping the exact moments where things actually go wrong. The angle of your chopsticks. The turn of your wrist. When to pour, when to roll, how to fix a tear. Those details are the whole dish, and they're rarely explained.
So this is the most detailed guide I know how to write. I'll walk through every step the way I teach it in person, including the parts other recipes leave out.
🎥 Prefer to watch? I've filmed this whole series, every step, every flip, every wrist movement. Watch the dashimaki tamago video series on YouTube or Instagram. The written guide below explains the why behind each move.
What Is Dashimaki Tamago (and Why It's Harder Than Tamagoyaki)
Dashimaki tamago (だし巻き卵) is a Japanese rolled omelette made by cooking thin layers of seasoned egg and rolling them into a soft, layered log. The name literally means "dashi-rolled egg."
People often confuse it with tamagoyaki, but there's one critical difference: dashimaki tamago contains dashi stock. That extra liquid is what makes it fluffy, custardy, and deeply savory. It's also exactly what makes it so difficult to roll. More moisture means a softer, more delicate egg that wants to tear instead of fold.
So if your first attempts fall apart, you're not bad at cooking. You're working with a genuinely tricky ingredient. That's normal.
Quick distinction: Tamagoyaki = sweeter, firmer, holds its shape in a bento. Dashimaki tamago = softer, juicier, melts in your mouth. This guide covers the dashi version.
No Bamboo Mat Needed (Here's Why)
Most recipes finish by wrapping the omelette in a bamboo sushi mat (makisu) to shape it. I don't, and you don't need one either.
Instead, I shape the roll by hand, with technique, while it's still in the pan. There are two reasons:
It's more forgiving. You correct the shape as you go, not after.
It's how a real home kitchen works. Most people learning at home don't own a makisu, and they shouldn't have to.
When you build the shape layer by layer, a torn layer simply gets hidden by the next one. Mistakes disappear. That's the whole philosophy, and it's exactly why the small in-the-pan techniques below matter so much.
A Few Key Ingredients
The base looks simple: eggs, dashi, a few seasonings, and a neutral rice oil (米油) for the pan. But the seasoning is more than just soy sauce, and the exact balance is what turns it into proper dashimaki rather than plain tamagoyaki. Get the ratios right and it's the difference between fluffy and rubbery.
I won't reprint my full measured recipe here. The precise quantities, the dashi I use, and the full seasoning balance all live in my cookbook, A Humble Japanese Cookbook, where I walk through it properly with the rest of my Osaka home-cooking dishes. You can get it here: yukichef.com/cookbook
What I can give you in full, for free, and it's the part that actually trips people up, is the technique. That's what the rest of this post is about.
A note on gluten-free: dashimaki tamago is naturally gluten-free as long as your dashi and soy sauce are gluten-free. If you have celiac or a gluten sensitivity, use a certified tamari instead of regular soy sauce. Gluten-free Japanese cooking is a core focus of mine, so I test every ingredient for it.
Step 1: Layer 1, The Foundation
Don't aim for perfection here. Aim for a base.
Whisk the eggs gently with the dashi and seasonings (the full mix and amounts are in the cookbook). Don't over-whisk; you want them combined, not foamy.
Heat your pan over medium. Soak a folded paper towel in rice oil and wipe the pan with it. You don't pour oil straight into the pan; wiping it on with the towel keeps the layer thin and even, so there's no excess oil to pool.
Pour in a thin layer of egg liquid. The dashi-to-egg ratio matters a lot here, and it's the one number I'd really point you to the cookbook for.
When the surface is just set but still glossy, fold the egg into thirds and push it to the back of the pan.
That's Layer 1. It will probably look messy. That's fine. It's going to be hidden inside the finished roll.
Why most people fail at Layer 1: they wait too long. Roll while the surface is still slightly wet on top. A dry surface won't bond to the next layer and your roll will separate into sheets.
Step 2: Layers 2 & 3, Building the Roll
This is where the magic happens.
With your cooked egg resting at the back of the pan, lift it slightly and pour fresh egg liquid into the front of the pan and under the cooked egg. This glues each new layer to the last.
Pop any large bubbles with your chopsticks as they form; bubbles create holes and weak spots.
Roll the egg toward you over the new layer, then slide the finished roll back to the far side of the pan, ready for the next layer.
Repeat until you've used all your egg. Each pass adds a layer, and each layer makes the roll stronger and more beautiful in cross-section. You shape it as you go, gently nudging it square against the side of the pan, no bamboo mat required.
The Technique Series: The Part Nobody Explains
Here's what I wish someone had told me when I started. The actual recipe is the easy part. The hand movement is everything.
Holding Your Chopsticks
You're not stabbing the egg. You're going to pinch it. Hold your chopsticks at an angle so you can grip the egg from both the top and bottom at once.
The Flip: "This Is Where Most People Panic"
When it's time to turn the egg over, people freeze. They grab too hard, the soft egg tears, and they give up.
Don't grip and yank. Slip the chopsticks in at an angle, pinch the egg top and bottom, and lift the pan slightly as you turn. Let gravity and the pan do half the work. You are guiding, not forcing.
The Wrist: "It's Not Your Chopsticks. It's Your Wrist."
This is the single most important sentence in this entire post.
Beginners try to do everything with their fingers and the chopsticks. But the actual rolling motion comes from a smooth turn of the wrist, the same motion in both hands, pan and chopsticks working together. Once your wrist leads the movement instead of your fingers, the whole thing suddenly clicks.
Fun fact: I started filming these technique videos because I picked up knitting, kept searching for how a stitch was actually done, and realized cooking videos almost never explain the hand movement either. So I made the ones I wished existed. My recurring character, the Dashimaki Gang (sunglasses, tattoo, arms crossed, "Hey!"), is my way of keeping a genuinely fiddly skill fun.
🎥 This is the one to watch, not just read. The wrist turn is almost impossible to capture in words. See it in motion in my dashimaki tamago technique video, then come back and the steps below will make a lot more sense.
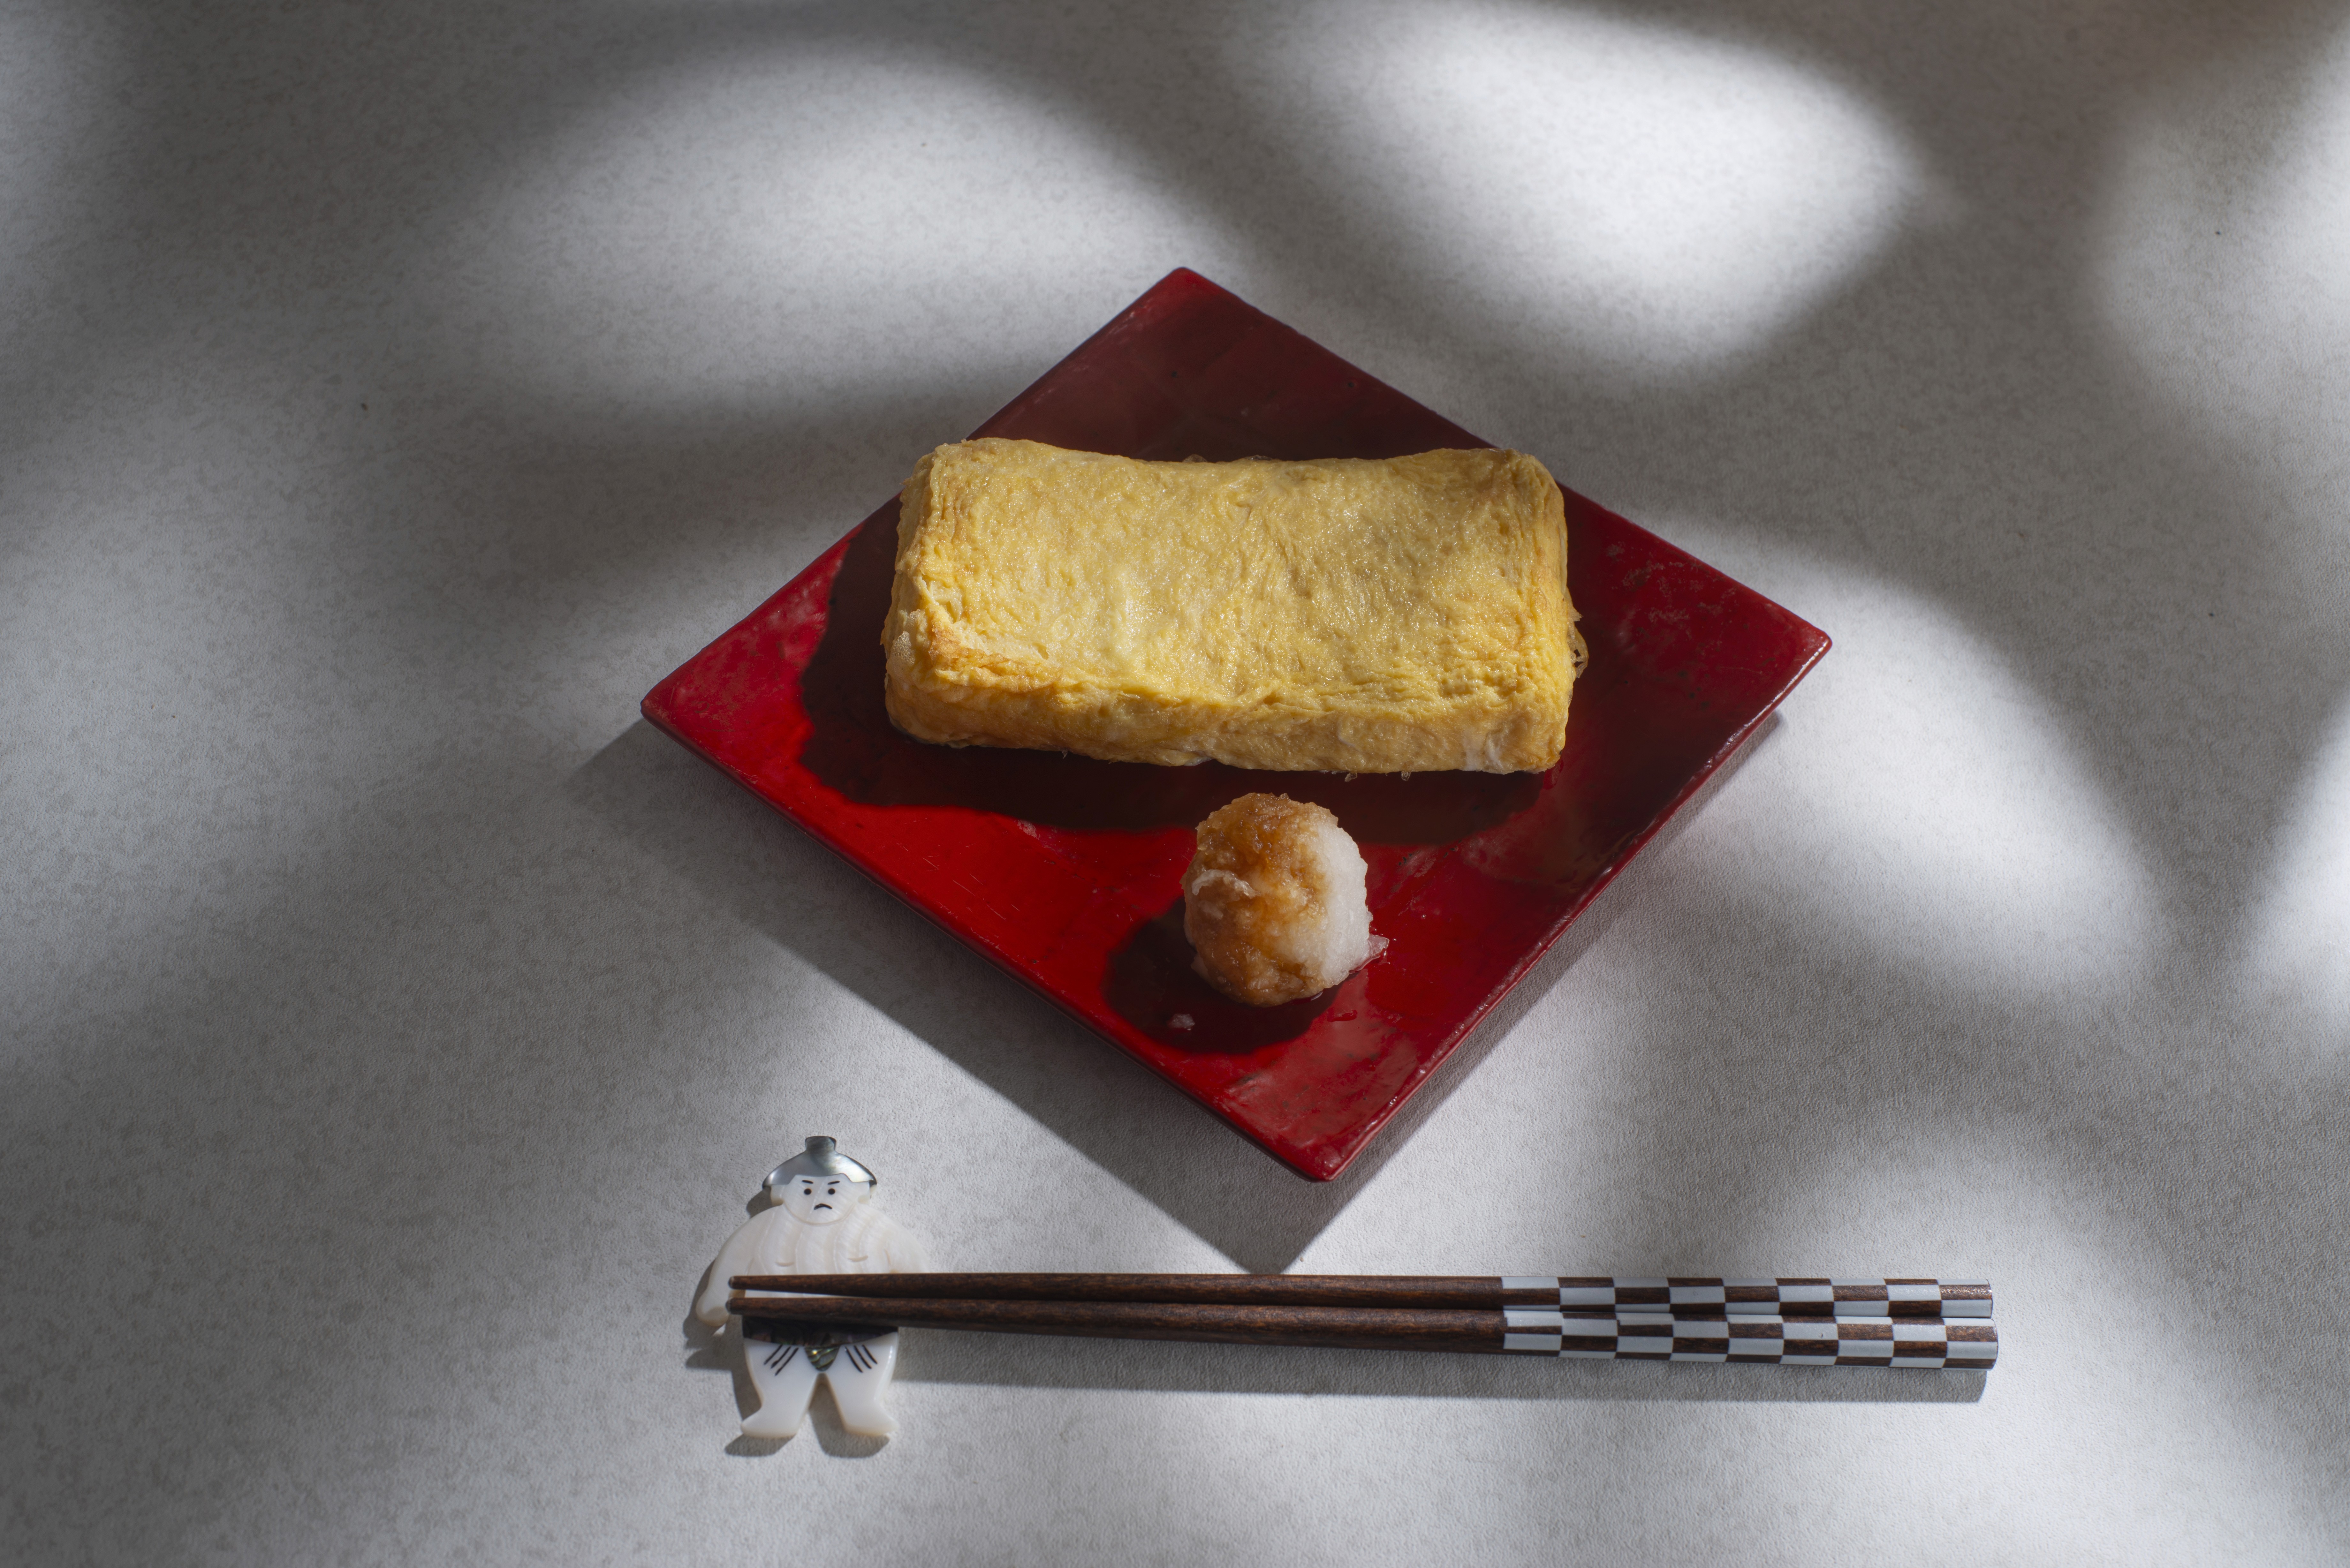
Step 3: Slicing & The Cross-Section
Once your roll is built, let it rest for a couple of minutes so the layers settle. Then slice crosswise into thick pieces (about 2 cm) to reveal the spiral of layers inside.
Because dashimaki tamago releases liquid as it sits, serve it fresh. It's at its best within minutes: soft, warm, and juicy. Traditionally it's served with grated daikon and a little soy sauce.
Flavor Variations: Because Cooking Is Endless ✨
Once you've got the base technique, the roll becomes a canvas. Here are three I love.
1. Cream Cheese Sandwich Roll
A modern, brunch-style twist. Add a splash of soy sauce to the egg liquid for extra depth, then tuck cream cheese between Layers 2 and 3. Serve it sandwich-style with wasabi mayo, avocado, and soft milk bread. Rich, creamy, a little spicy.
2. Nori, Kimchi & Cheese (Japan-Korea Fusion)
Layer nori seaweed, kimchi, and cheese into the roll as you build it. The kimchi brings tang and heat, the cheese melts into the egg, the nori adds umami. A playful Japan-meets-Korea mash-up.
3. Unagi Maki (The Traditional Finale)
The classic. Roll grilled eel (unagi) into the center for a restaurant-style dashimaki that feels special. This is the dish that ties the whole series back to tradition, where modern technique meets the real thing.
Common Questions
Do I really not need a tamagoyaki pan? A rectangular pan helps, but you can absolutely make this in a round non-stick pan. Your rolling and shaping technique matters more than the pan shape.
My layers keep separating. What's wrong? You're rolling too late. Roll while the top is still glossy and slightly wet so the layers bond.
Why is my omelette tough? Too much heat, or too little dashi. Keep the heat at medium and don't skimp on the liquid; that's where the fluffiness comes from.
Is dashimaki tamago gluten-free? Yes, if you use gluten-free dashi and tamari instead of regular soy sauce. Always check labels.
Want to Learn This Hands-On?
You'll actually make tamago like this in my sushi class and my modern vegetarian sushi class in Osaka. It's the rolled omelette that tops the nigiri, so you roll it yourself. These are small groups (max 4 guests) in a quiet Japanese-style home in Higashi-Osaka, with gluten-free options throughout, drawing on my training at a Michelin Bib Gourmand izakaya. There's something about feeling the wrist motion in person that a video just can't replace.
📍 See the sushi class and vegetarian sushi class at yukichef.com 📖 And for the full measured recipe, plus the rest of my Osaka home cooking, my cookbook A Humble Japanese Cookbook is here: yukichef.com/cookbook 🎥 Or follow the whole dashimaki tamago series on YouTube and Instagram for every episode, basic to arrangement.
Cooking is endless. Start with one good roll. ✨
Instructions
Step 1